To enable the voice chat in Roblox, follow the instructions below:
1.- Go to your Roblox Account Settings
2.- Complete the Age Verification
3.- Select the Privacy Tab
4.- Toggle the voice chat selector to ON
The toggle will turn from grey to green, indicating that voice chat is enabled for your account.
2.- Configure your mic and headphones in Voicemod
After enabling the voice chat in Roblox, the next step will be to check that Voicemod is to check that Voicemod is properly set up. To do so:
1.- Open Voicemod
2.- Go to Settings
3.- Select your preferred Microphone from the dropdown list
4.- Select your preferred Headphones from the dropdown list
5.- Search for an Audio Strem Up message at the bottom of that settings page
6.- If the stream is not up, please choose any other Mic and Headphone combination until it is up.
You can check how you sound by using the hear myself icon in the Voicemod bottom bar.
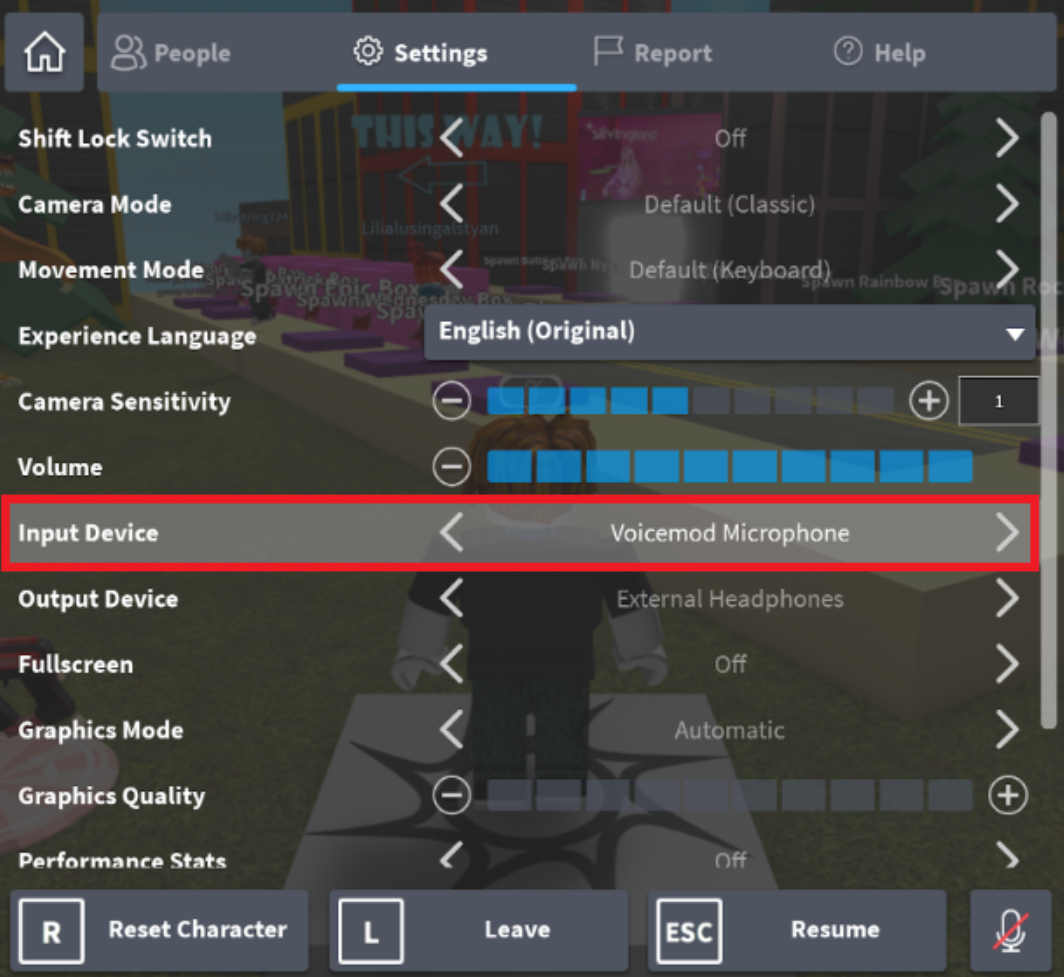
3.- Set your Voicemod microphone in Roblox
You’re all set for success. The only missing piece will be going into a Roblox game and selecting “Voicemod Microphone” as your Input Device.

That’s all! Now you can change your voice and use your soundboard in Roblox. Enjoy!